General Settings
Website Title
Enter here the title of your website, which most templates will display by default prominently on every page in your site. Depending on the template used, the website title may also be appear in the title bar of the browser window, for every page of your site. You should not use html in the website title.
Website Description
Should be a short text, briefly and concisely describing your site. Depending on the template used, this text will be inserted as a meta-tag into the html 'head' section of every page in your site - whenever that page does not have its own separate description.
You can give every page in your site its own, individual, specific description, in the Admin->Pages->Change Settings for the page. The “description” meta-tag can be used by search engines to help catalogue, describe and list your site in their database.
Some templates also use the website default description prominently, sometimes placing it as a 'sub-title' for the site, or displaying it as a special 'blurb' within the body of pages. You should not use html in the website description.
Website Keywords
This should be a comma-separated list of words, terms and/or expressions that users are going to use in search engines to find your site. This list is automatically included as a meta-tag in the html 'head' section of every page in your site - whenever a page does not have its own specific keywords.
You can define separate, specific keywords for every single page in your site, in the Admin->Pages->Change Settings area for the page. The “keywords” meta-tag is used by most search engines to help classify and catalogue your site in their database, and can greatly influence how successful users are in finding your site through these search engines. You should not use html in the website keywords.
The order and quantity of keywords does matter. Some search engines will grade how closely a search matches your page, depending on how far down the keywords list it the match is found. Most search engines will also 'cull' your keywords list, if it is too long, to an acceptable length, and ignore repeated entries.
Website Header (Advanced)
Templates may use the header text in their design. Header text, if used, usually appears at the top (header) of every page in your site. Typical header text may include, for instance, a slogan, catchphrase or sub-title for your site.
You may use html in the header.
Website Footer
Templates may use the footer text in their design. Footer text, if used, usually appears at the bottom of every page in your site. Typical footer text includes, for instance, a copyright notice for the site.
You may use html in the footer.
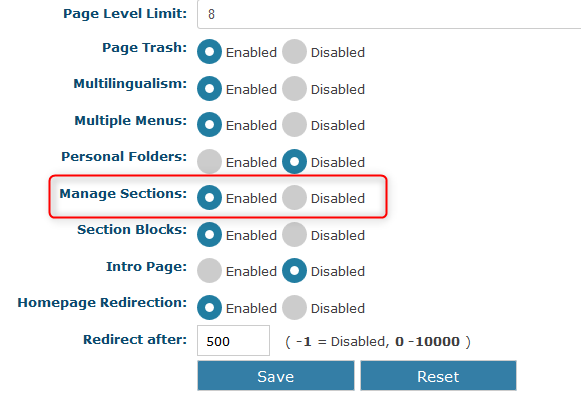
Page Level Limit (Advanced)
This setting specifies how 'deep' the structure of your site can be. If Page Level Limit is set to 1, then your site has a 'flat' structure, and all pages in your site are at the same level as the “Home” page. If Page Level Limit is 2, then these pages are allowed to have 'children' pages. If Page Level Limit is 3, then these children pages are allowed to have children of their own.
Sites with 'deep' structures tend to make it harder for users to find information.
Restricting Page Level Limit to 2 or 3 can force your site structure to stay simple, and therefore make it easier to navigate.
Page Trash
When you delete a page from your site, WB confirms the deletion, and if you click “OK”, the page is permanently deleted from the database. This means that Page Trash is disabled - which is the default behaviour of WB.
If Page Trash is In-line, however, when you 'delete' a page it is simply made unavailable. You will still be able to see the page in the Pages list, and 'undelete' it if you need to. In Admin->Pages->Modify/Delete Page, you just need to click the 'restore' icon to undelete a page:

In-line Trash: “Home” has been 'deleted' – use the green “restore” arrow
![]() to undelete
to undelete
You can still permanently delete a page, even if Page Trash is in-line. Just delete the page a second time, by clicking the 'trash' icon in the Pages list, and confirm.
Page Languages (Advanced)
When enabled, WB automatically hides from the website menu any page that is not in the language of the current logged-in user. So, if the user has selected “English” as their language, only English pages appear in the website menu. If the user has “German” selected, only German pages appear. Users that are not logged in will see only the pages in the language chosen as the default for the site (Admin->Settings->Default Settings->Language).
When disabled, the site menu will include all pages, regardless of the language that the page is in, or the language the user has selected.
Multiple Menus (Advanced)
Some templates allow you to have more than one navigation menu in your site. This may be useful, for instance, if you would like to have a 'footer menu', with pages such as 'terms & conditions', 'privacy notice', 'copyright notice', 'links', or others, which you may want to show throughout your site, but which you do not want users to perceive as part of the normal navigation hierarchy of your site.
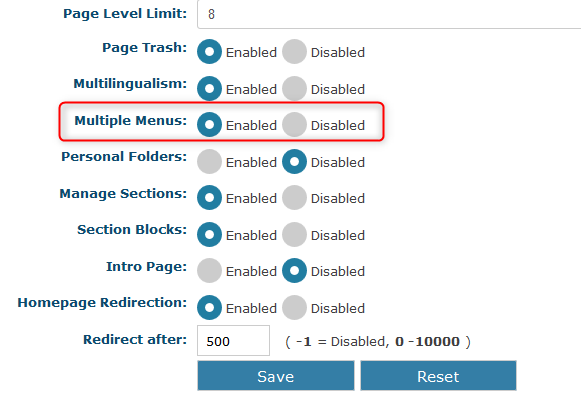
Enabling this feature while using a template with only 1 menu has no effect. This feature only works if you are using a template that supports more than one menu!
If the template you are using supports multiple menus, and you wish to use this feature, enable it here, and save your settings. Now, when you visit a page's Pages > Change Settings, you will see an extra option: a “Menu” menu, which allows you to select on a page-by-page basis, in which of the navigation menus the current page will be listed.
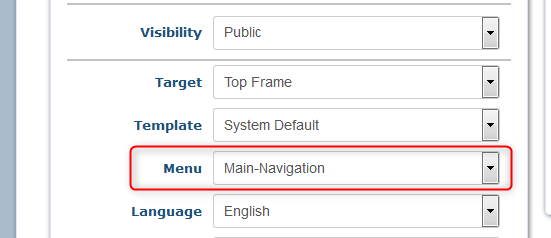
the “Menu” menu appears in the Page Settings
If the template you are using does not support multiple menus, you may be able to easily modify it, to add the extra menu(s) you want. To find out how, download our guide to modifying templates: the Template Primer!
Personal Folders
This option allows you to specify private media folders for registered users of your site. This allows users to upload images and files to a private area of their own, which others cannot access or view. In order for the users' “Home Folders” to work, you must:
- enable “Home Folders” here
- create all required Home Folders manually, in Admin > Media
- assign each previously created Home Folder to the appropriate user(s), in Admin->Access->User
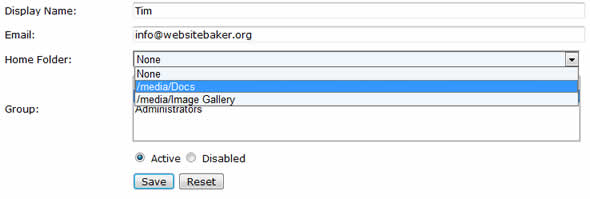
once Home Folders is enabled, you must assign a default home folder to each user
When Home Folders is enabled, users cannot see the Home Folders that you've assigned other users. Any unassigned folder, or file, in the media folder itself, is considered 'public', and is seen by all users, even if Home Folders is enabled. When Home Folders is disabled, any user who has access to the “Media” section is able to see all folders and subfolders there.
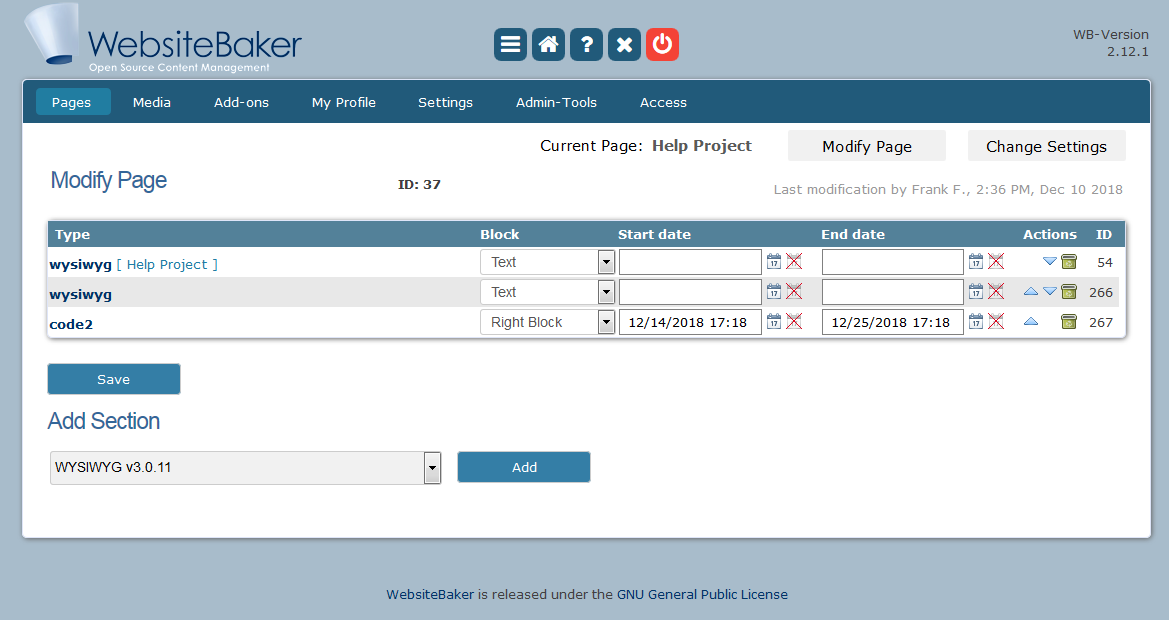
Manage Sections (Advanced)
By default, each page in your site can have several 'sections' – and each section can be of a different type. You can add, remove and reorder page sections in Pages > Manage Sections.
This option, however, allows you to completely disable access to the “Manage Sections” area of all pages in your site, thereby disabling the capability to add/remove or reorder the sections of any existing - or future – page.
shortcuts in a page's Modify Page heading: while editing a page with Manage Sections enabled...
Section Blocks (Advanced)
Even if you specify several different sections inside a single page, all these sections normally appear inside a single block.
Some templates, however, have more than one single block where you can add sections. This allows you to add content to different areas on a page – such as, for instance, adding sections to a sidebar, or to a footer, as well as to the main content area. This can be useful for adding news snippets, shoutboxes, quotes, or other secondary content to specific pages of your site.
Note:
For this option to work, you must be using a template that has multiple blocks, and “Manage Sections” must be on!
If the template you are using supports multiple blocks, and you wish to use this feature, enable it here, and save your settings. Now, when go to the “Manage Sections” of any page in your site, and for every section there you will see an extra option: a “Block” menu, which allows you to select on a section-by-section basis, in which block the current section will appear.
managing sections with Section Blocks enabled
If the template you are using does not support multiple blocks, you may be able to easily modify it, to add the extra block(s) you want. To find out how, download our guide to creating and modifying your templates: the Template Primer!
Intro Page
By default, the 'home page' of your site – the default page that is shown when users navigate to the directory where WB was installed – is the very first page listed in the Pages > Modify/Delete Pages section. This page is just like any other page in your site - and you can create it and modify its content just as you do all other pages.
Under some rare and special circumstances, however, you may wish to have an introductory page that is totally different to – and outside the rest of – your site. This may be, for instance, because you must force the visitor to view a warning before entering your site, or ask them to make a selection, or run some custom programming code. In such cases, you can specify here, that your site needs an intro page.
Intro pages are very rarely needed. Chances are, you can achieve the same functionality simply by adding an extra page to your site, selecting a different template for that page, and moving that page so that it becomes your home page.
Once “Intro Page” is enabled, at the bottom of your Admin->Pages section you will see a third area, “Modify Intro Page”. That area allows you to enter the content of your site's custom intro page.
You must remember to add links in the intro page to the rest of your site, as the site menu does not appear in the intro page. The menu does not appear in the intro page, because it is part of your site's template. Your intro page does not use the site's template. Therefore, you must design the intro page in full.
Homepage Redirection (Advanced)
When a visitor first enters your site, WB 'silently' directs them to your home page, without changing the address that is displayed in the user's browser. If “Homepage Redirection” is enabled, however, the redirection will be visible in the browser – the address bar will show the true address of the home page.
Homepage redirection off: https://www.mycompany.com
Homepage redirection on: https://www.mycompany.com/pages/home.php
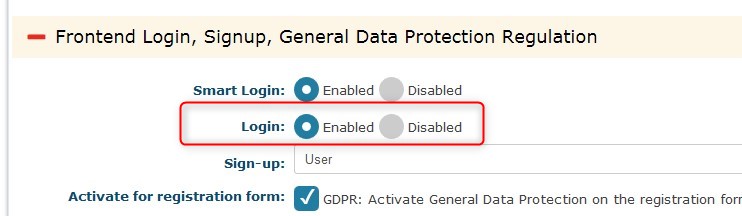
Login
Most WB templates can display a login/logout form in the frontend of your site. This is useful for sites where you may have members who should have access to special private areas of the site, but who do not necessarily have to have any access to the admin. The login form can display other useful items as well, such as a signup link – if you have Sign-up enabled. The login form, once the user has logged in, displays a user greeting, and turns into the 'logout' form!
If Login is enabled, and you are using a template that uses the login form, then it will be displayed. If Login is disabled, the login form will not be displayed in the frontend, even if the template includes it.
Users that need to have access to the Admin area of your site – such as page and content Editors – can still log in through the normal Admin area login page, even if Login is disabled.
Redirect after (Advanced)
Many actions in the backend (modul installation, page changes, ...) are showing messages, if they were or weren't successful. The time of displaying such messages you can set up here in milliseconds. The standard is 1500 (1.5 seconds).
Sign-up
This option allows visitors to sign-up from the frontend, to become members of your site. Anyone signing up will be automatically accepted, and will become a member of a group, which will be selected by you here.
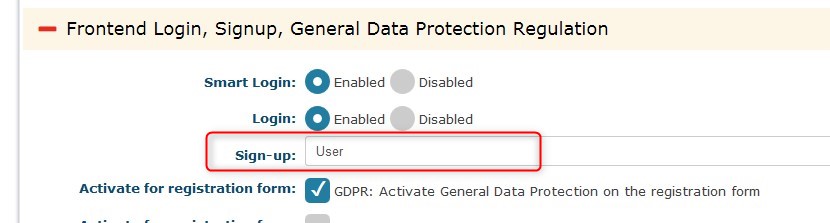
selecting which group new users will belong to automatically after Sign-up
In order to minimise automated registrations by spammer bots, you can enable a verification captcha during the sign up process – please see above, under “Captcha Verification”.
In order for automated Sign-up to work, you must:
- enable Log-in, in Settings > General Settings
- use a template that uses the login interface
- define a group, to which all new site users will automatically belong to – you can do this in Access > Groups
- finally, in Settings > General Settings > Sign-up, select the group you defined for the new users
once Sign-up has been enabled, visitors will see a “Sign-up” link in your login form
Once users sign up, they are sent an automated email message, containing a randomly generated password. Using that password, they will be able to log on, and change all of their preferences to their liking - including the password itself.
PHP Error Reporting Level (Advanced)
This setting is used to help programmers and developers troubleshoot problems and incompatibilities, and unless otherwise instructed, it should be left at “Production”.
Select "None", "Production" or "Development".
WYSIWYG Style (Advanced)
If the WYSIWYG editor you are using is HTMLArea, you can enter style information here – such as default font, and font size – that will be used when using HTMLArea to edit content. This setting may not work with other WYSIWYG editors. It is only useful in helping you format the display of what you see while working in the editor, and does not affect the appearance of pages in your site.
WYSIWYG Editor (Advanced)
You can choose here the editor you want to work with. Standard is FCKeditor - you can download another one or choose "None" if you prefer editing your sites just as HTML sourcecode.