The previous two sections described the required steps to prepare an existing static 3-column CSS layout consisting of a index.html and a screen.css file. The static contents of the index.html file were replaced by the WB specifiy template functions. To create a working WebsiteBaker template out of the modified index.html and screen.css, the following steps are required.
- Step 1: Rename index.html
- Step 2: Create a info.php file
- Step 3: Create an installation package
- Step 4: Install the template
- Step 5: Adapt WB settings
Step 1: Rename index.html
A valid WebsiteBaker template requires the two files index.php and info.php. The file index.php contains the basic structure (HTML elements) and the WB template functions to display the contents stored in the database.
Rename the modified index.html which contains the WB template functions into index.php. The extension .php is required to execute embeded PHP code.
Step 2: Create a info.php file
The file info.php contains template information required by WebsiteBaker such as template name, template directory, author, licencse and a short description. The template directory allows only underscrores as separators, no hyphens or whitespaces. As our template features multiple menues and blocks, some additional information needs to be added. The info.php file can be created with a simple text editor. The first 8 rows are required for all templates.
Please note the starting (<?php) PHP tag.
<?php
$template_directory     = 'mytemplate'; // or my_template
$template_name          = '3-spalten CSS';
$template_version       = '2.6';
$template_function      = 'template';
$template_platform      = '2.8.x';
$template_author        = 'Christian Sommer';
$template_license       = 'GNU GPL';
$template_description   = 'WB-Template based on tutorials of Maxdesign.';

// Definition of menus (if more as one is used)
$menu[1]    = 'Main-navigation';
$menu[2]    = 'Sub-navigation';

// Definition of section blocks (if more as one is used)
$block[1]   = 'Maincontent';
$block[2]   = 'News';
Step 3: Create an installation package
Our first WB template consists of three files:
- index.php: contains the basic HTML layout and the WB template functions
- screen.css: contains the styles for positioning and layout
- info.php: contains infos about template name, author, license and additional menues or blocks
To create a working installation package for WebsiteBaker, the files needs to be joined into a Zip-archive (*.zip). For Windows one can use the Open Source tool Tool 7-zip .
Unix/Linux users can use the comand line tool zip:
zip mytemplate_en.zip index.php screen.css info.php
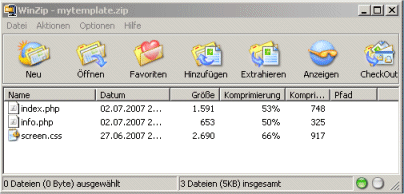
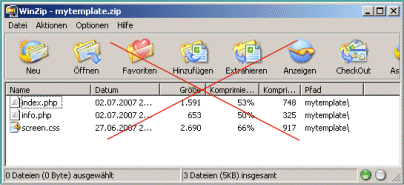
The zip archive must not contain the folder in which the three files are stored.

Figure 1: Right archive format without the root folder!

Figure 2: Wrong archive format which contains the folder in which the files are stored!
Step 4: Install the template
Once the installation package (zip archive) was created as shown in Figure 1 above, it can be installed via the WB backend: Add-ons -> Templates -> Install Template.
You can download the installation package (zip archive) of the finished WB template tutorial .
Step 5: Adapt WB Settings
In the default settings of WebsiteBaker, the usage of multiple menus and blocks are enabled. This can be changed here:
Enable multiple menus:
Settings -> Show Advanced Options -> Multiple Menus -> Enabled/Disabled
Enable multiple blocks:
Settings -> Show Advanced Options -> Section Blocks -> Enabled/Disabled
Use the new template as default template:
To use the new template as default for all existing and new pages one needs to change the following settings via the WB backend:
Settings -> Default Settings -> Template -> 3-column CSS
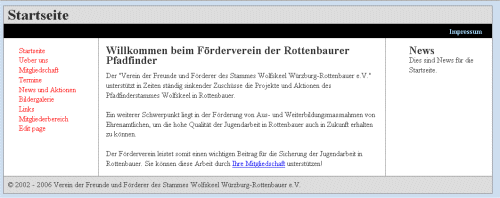
The result (with German content) can be seen in the figure below.

Figure 3: The new template in action (German contents)