A “News” page/section is a blog, where you can post articles for others to read. You can classify your articles in 'groups', and optionally allow your site's users and visitors to leave comments.
You use the News editor to create, edit, delete and manage your postings, and the comments your users and visitors have left.
The News editor has 3 main buttons - “Add Post”, “Add Group” and “Settings” - as well as 2 sub-sections - “Modify/Delete Post” and “Modify/Delete Group”.
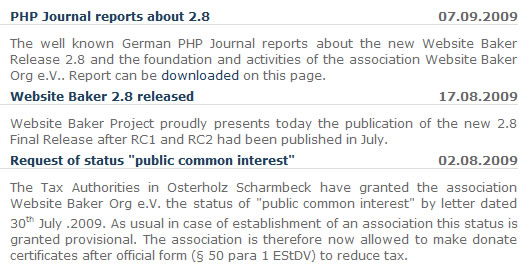
A typical news page, listing articles the visitor can click on to read in detail
Add Post Button
Click this button to add a new article to the blog. Having clicked the button, your options will be:
- Title: the headline of the article
- Group: If you have defined groups to categorize your articles, select which group this article belongs – see “Add Group Button” below.
- Commenting: if “Disabled”, users and visitors are not allowed to leave comments about this article. Select “Private” to allow only registered users to leave comments, or “Public” to also allow comments from anonymous site visitors. Visitor comments can be modified (edited and deleted) – see the “Modify/Delete Post” section below.
- Active: If “Yes” is selected , the article is listed and appears in the news page. If “No” is selected, the article is not included in the list – useful for removing an article from the news page without having to delete it.
- Start date/End date: If you want an article to appear time-dependent, you can enter the start and end date here. When you leave the fields blank, the article will always be visible. Clicking on the icon "Calendar" shows a month calendar. You can switch to the previous or next months by clicking the arrows. A click on the double arrow changes the year. The time is entered below - but can also be entered with the date like "22/03/2010 16:45" however. Clicking the icon with the red X deletes the entered dates.
- Short: A 'lead-in' or 'teaser' for your article – a couple of lines of text that should animate the reader to read more. This text is shown on the news page below the headline.
- Long: your actual article
- Save/Cancel Buttons: After entering all information as needed, click “Save” to save the article, or “Cancel” to return to the News editor without saving.
If you use a WYSIWYG Editor (like the standard text editor of WebsiteBaker: CKEditor), then you will be able to format the “Short” and “Long” fields, using lists, tables and images, to enhance the presentation of your articles.
Add Group Button
“Groups” are categories that you can use to classify your news articles. You can associate a picture with a group, and the group picture will be displayed in all articles belonging to that group. You can also 'deactivate' – i.e. hide – a group, thereby hiding all articles that belong to that group from the news page.
Click the “Add Group” button to create a new group. This will give you the following options:
- Title: the name of the group/category
- Image: An optional image, from your hard drive, to be associated with the group – click the “Browse...” button to select it. Please note that the group image may be resized, depending on your settings – see the “Resize Image To” option in the “Settings Button” section below.
- Active: If “Yes” is selected, the articles belonging to this group will be listed and will appear in the news page. If “No” is selected, the articles are not included in the list – useful for removing a group of articles from the news page without having to delete them.
- Save/Cancel Buttons: After entering all information as needed, click “Save” to save the group, or “Cancel” to return to the News editor without saving.
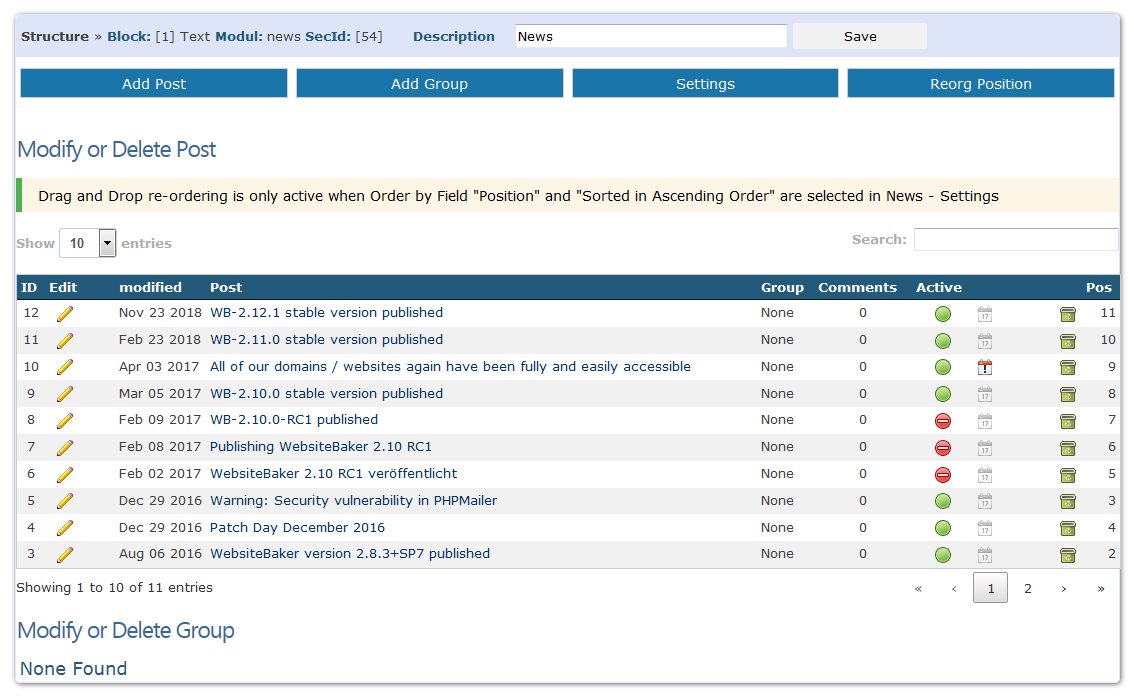
The overview page of a news page
Settings
Clicking this button takes you to the “Settings” page of your blog, where you can specify several preferences that control the way your blog operates, as well as its layout structure.
The fields that control the layout structure of your blog use a mixture of html, css and WB markup code are shown below:
General Settings
- Header, Post Loop & Footer: together, they build the main article list
- Post Header & Post Footer: used in the article page, respective before and after the article's content
- Posts Per Page: If “Unlimited” is selected, all your articles – regardless how many there are – will be listed in one long list. You may, if needed, select a maximum number of articles per page here, and WebsiteBaker will automatically divide and paginate the list for you.
Comments
- Commenting: select here the default comment setting for all new articles. Options are:
- Disabled: comments are not allowed.
- Private: The “Add Comment” link is only displayed once a user has logged in – only registered users will be allowed to leave comments.
- Public: The “Add Comment” link is always displayed, and everyone – including anonymous visitors – will be allowed to leave comments.
Changing this setting only affects future articles – it will not change the Commenting settings in existing articles!
- Captcha Verification: If “Enabled”, the comment page will contain a captcha field, useful to prevent spamming.
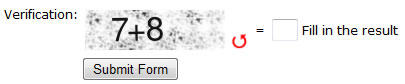
A typical captcha verification as visitors will see itNote: The use of captcha verification is defined in "Admin-Tools -> Captcha and Advanced-Spam-Protection (ASP) Control", e.g. the type of captcha and Advanced Spam Protection (ASP), which is a spam protection function invisible for humans. - Resize Image To: You can use this setting to specify a maximum size for images for article groups. If set to anything other than “None”, the image will be scaled down, if needed, to fit within the selected square size – specified in pixels.
Changing this setting here only affects future images that you select for groups – it will not rezise existing images!
To resize existing group images:
1. select here the new image size you wish the group to have
2. delete the image from the group
3. upload the original image for the group again and save.
- Comments Header, Loop & Footer: Together, they build the main list of comments being displayed below the actual article - if visitors have commented on this article already.
- Comments Page: a headline for the comments page that the user/visitor is taken to after clicking “Add Comment” below an article.
If you know html and css it should be no problem to customize the contents of these layout fields to give your news page a unique layout and structure - if desired.
- Save/Cancel Buttons: After entering all information as needed, click “Save” to save the new settings, or click “Cancel” - to return to the News editor without saving.
Edit CSS
Almost all modules for modern versions of WebsiteBaker (2.7 and higher) offer the function to edit backend.css to change the layout of the backend part of the module and frontend.css for the frontend layout. WebsiteBaker provides you with the comfortable Editarea editor, which contains amongst others syntax highlighting which helps avoid sources of errors. Some css experience can be useful however.
Modify/Delete Post
Use the list in this section to manage existing news articles and the comments attached to an article.To reorder the articles, use their “up” and “down” icons rightmost. To delete an article, click on its “delete” icon.
To edit an existing article or to manage user/visitor comments, click on the article's title, or on its “Modify” icon, which takes you to the article editing page.
The controls for editing the article are exactly the same as those used for creating it – see Admin -> Pages -> Modify Page -> News -> Add Post.
At the very bottom of the article editing page, you will find a sub-section titled “Modify/Delete Comment”. This contains a list of all comments left by users/visitors. You can click on a comment title to view (and edit) it, or click on its “delete” icon to delete it.
Modify/Delete Group
Use the list in this section manage article groups. To reorder the groups, use their “up” and “down” icons. To delete group, click on its “delete” icon.
To edit an existing group, click on its title, or on its “Modify” icon – which takes you editing page.
The controls for editing a group are almost the same as those used for creating it – see Admin -> Pages -> Modify Page -> News -> Add Group. The main difference being, that if the group already has an image assigned to it, you will be able to view it, delete it, and reassign a new one, if needed.
![]()
Choose if you want to view or change an existing group image