As soon as you create a new page in your site, this page contains one, single, default section. The pages in your site, however, can have multiple sections, and you can mix different section types in the same page.
To add, delete or reorder a section of a page enter the Manage Sections area using the “Manage Sections” link in the header of the “Modify Page” or “Change Settings” area of the page - if "Manage Sections" is enabled in Settings -> Show Advanced Options -> General Settings. Once you enter the Manage Sections area, you will see the Manage Sections header for the page:
The Manage Sections area has links to the “Modify Page” and “Change Settings” areas
Below the Manage Sections header, you will see a list of all the page's sections, in the order in which they appear on the page.
Publish Sections Time-dependent
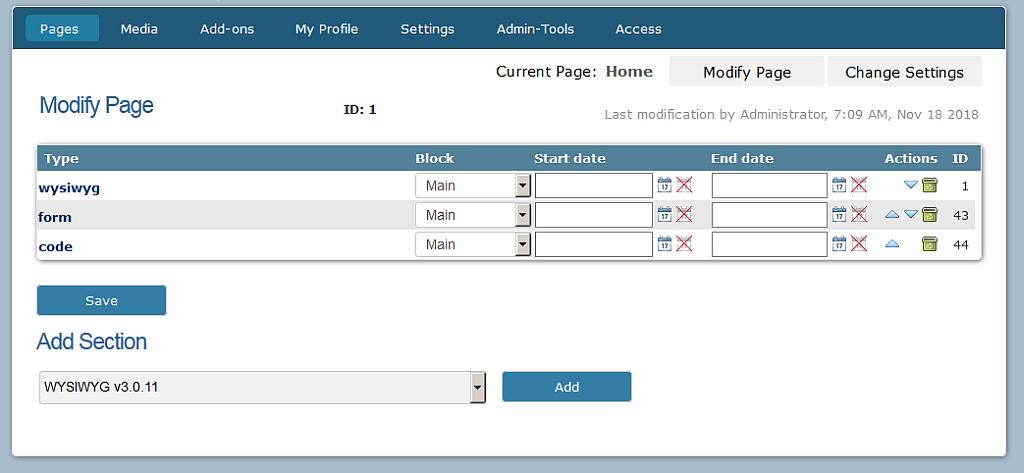
Sections as well as news articles can be published time-dependent. Just fill in the dates in the Start date and End date fields. If you leave the fields blank, the section will always be visible. Clicking on the icon "Calendar" shows a month calendar. You can switch to the previous or next months by clicking the arrows. A click on the double arrow changes the year. The time is entered below - but can also be entered with the date like "22/03/2010 16:45" however. Clicking the icon with the red X deletes the entered dates.
Reordering Sections
To change the order in which sections appear on the page, click the “up” and “down” icons of the section, in the sections' list:
![]()
![]() A section's "up" and "down" icons, respectively
A section's "up" and "down" icons, respectively
If you have enabled "Reorder sections by the use of drag-and-drop" in "Admin-Tools -> Javascript Admin" section can as well be reordered using drag & drop.
Delete Sections
To permanently delete a section from the page, and all information contained within it, click the “delete” icon.
Warning: section deletion cannot be undone!
![]() A section's delete button
A section's delete button
Assigning Sections to a Block
Some templates can specify more than one area on the page where you can add your sections and display content – such as, for instance, in a sidebar, or in the footer, as well as in the main content area. This can be useful for adding optional, secondary content to specific pages in your site. For this feature to be available, you must:
- use a template that supports and uses Section Blocks
- enable Settings -> Show Advanced Options -> General Settings -> Section Blocks
To select the block (i.e., area of the page) where the section should be displayed, use the “Block” drop-down menu – then, click the “Save” button at the bottom of the Block column.
Edit a Section
To edit a section's content, click on the section 'type' in the list, or click on the “Modify Page” link in the Manage Sections header. Either way, you will be taken to the pages Pages -> Modify Page.
Add Section
To add a new section to the page, select the section type from the “Add Section” menu, and click the “Add” button.
For extensive explanation on the configuration and settings for all standard section types, see Pages -> Modify Page.
Briefly:
- Code: if you know php, you can use 'code' sections to enter php code directly into the page
- Form: setup cutomized forms that your site visitors and users can use to fill out and submit information to you
- News: a fully-functional blog, which optionally accepts visitor comments
- Wrapper: used to display external content – such as a page from an external website – inside your site
- WYSIWYG: the most common section type, holds static content, such as formatted text, lists, tables, images, and hyperlinks